Main

March 2, 2011

Little Helper Tower

We are in the process of making Alex something similar to a Learning Tower.

web-P1070879.JPG

Hopefully in the next few days these pieces of wood (and some not pictured) will turn into the desired item. It will offer a secure environment for Alex to participate in kitchen activities. Right now he wants to drag a chair around and stand in it. Since we don't allow this, one of us usually ends up holding him so he can see what we are doing.

A Learning Tower will cost you around $200. Our project cost around $40 (wood, stain, polyurethane, screws). I will post pictures of the finished project. Plans for the Little Helper Tower can be found on Ann-White's website. I also have plans to make Alex a picnic table.

In an hour or so I can add some more polyurethane to the wood. I would love to complete this project by the weekend.

January 7, 2010

Alex's Plate

Here is Alex's plate. I love it! Now I just need to find a way to display it in our house.

web-P1010742.JPG

You can take a look at the plate before the glazing and firing here.

December 26, 2009

Daily December Activities Revisited

December 1: Holiday Mail for Heros
December 2: Zoo Lights
December 3: Christmas Coloring Page
December 4: Gingerbread House
December 5: Toys for Tots, Letter to Santa, and Christmas Party
December 6: Let's Say Thanks and Ornaments
December 7: Make A Child Smile and Ornament
December 8: Christmas Cards
December 9: Learn About Another Countries Christmas Traditions (United Kingdom)
December 10: Any Soldier
December 11: Office Toy Drive and Online Cookie Exchange
December 12: Purchase formula for shelter, Fourth Avenue Winter Street Fair, Parade of Lights
December 13: Christmas Candy (to share with neighbors)
December 14: Deliver most of Christmas Candy and Attend Party at Florentino's
December 15: Deliver the Rest of Christmas Candy, Donate Formula to Shelter, and Alex's Letter from Santa
December 16: Cookie Exchange and Gabe's Office Party
December 17: Color Me Mine
December 18: Winterhaven Festival of Lights
December 19: Holiday Festival and Follow That Star
December 20: Hand Print Mitten Ornaments
December 21: Christmas Carols and Dancing
December 22: My Special Christmas Adventure Book
December 23: Driving around looking at Christmas Lights and Watched How the Grinch Stole Christmas
December 24: Library Story Time, Watched Rudolph, Read The Night Before Christmas, Read Luke 2:1-18, Made Cookies for Santa
December 25: Opened Presents and Christmas Party

December 20, 2009

December 20

We made hand print mitten ornaments today. I painted Alex's hands (one red and one green) while Gabe held on to them. We actually did all of this one hand at a time and we stopped to wash his hands in between hand prints. We pressed his hand onto a white foam sheet. I drew a mitten shape around each hand print freehand and cut it out. I glued some ribbon on the back and also wrote "Alex 2009" with a marker. Finally, they made it to the Christmas tree. If I were doing this again, I would probably paint both hands green and stay away from the red paint. Cotton balls would look cute on the bottom of the mitten, but I chose white for the mitten, so it didn't look that great with white on white.

web-P1000880.JPG

web-P1000881.JPG

Follow our other daily December activities. December 1, 2, 3, 4, 5, 6, 7, 8, 9, 10, 11, 12, 13, 14, 15, 16, 17, 18, and 19.

December 7, 2009

December 7

We had two Christmas activities today, but one of them was sort of a continuation of yesterday. First, we sent cards to the three featured kids over at Make A Child Smile. Most of the children on the website have medical issues that they will not recover from. If you have a couple of spare minutes, I encourage you to write out a card or three. We included a picture of our dogs in the cards and I wrote a little story about them. I also encourage you to read the "DOs and DON'Ts" section in "Frequently Asked Questions". There are a lot of helpful tips like don't send candy due to allergies, don't send glitter, don't say "get well soon", do send cheery mail, do tell a story.

I bought contact paper, so our second activity was to make the ornament that I had planned for Alex yesterday. I placed a piece of contact paper, with the backing removed, on the floor. I gave Alex a pile of pieces of scrap paper and I let him adhere them to the contact paper. The idea was for him to cover the entire piece of contact paper. Since he didn't, I placed the contact paper on another sheet of white paper. I then cut out an ornament shape, added ribbon, and placed it on the tree. You can find the ornament pattern here.

web-P1010578.JPG

Follow our other daily December activities. December 1, 2, 3, 4, 5, and 6.

December 6, 2009

Ornaments

web-P1010572.JPG
Snowman Ornament.

I saw something similar to this at the mall and decided to come home and recreate it. It is really easy. Paint a popsickle stick white and let it dry. Cut out a hat and glue it on the stick. Use sharpies to "paint" the eyes, mouth, buttons, and carrot nose. You could use paint if you wanted, but I thought using a sharpie was pretty easy. Finally, I added the ribbon scarf and hanger. Oh, I also wrote "Alex 2009" on the back even though I pretty much made this one on my own. He did choose the ribbon.

web-P1010574.JPG
Santa Hat Ornament.

The idea for this ornament came from a website and I cannot find it. If it was your website I was looking at, let me know. I would love to give you credit for your idea.

To make the Santa ornament simply paint three popsicle sticks red and allow them to dry. Glue them together in the shape of a triangle. Next, I glued cotton balls onto the sticks to make the "fur" on Santa's hat. Next I attached a picture and placed a triangle shaped piece of red paper over the back of the ornament. I glued a ribbon to hang the ornament and wrote "Alex 2009" on the back with a sharpie.

I also really like the idea for this Santa ornament here. And this reindeer idea is cute too. Maybe we should try a snowflake ornament. So many cute ornament ideas.

December 6

Today we each sent a postcard through Let's Say Thanks. You can do it too! It is easy and free. Just select the postcard you would like to send, choose a message or write your own, and hit send. Xerox prints the postcards and sends them to deployed troops. It only takes a second to send one or even more.

We also made some Christmas ornaments. I did most of the prep work, but Alex glued the cotton balls to the popsicle stick.

web-P1010568.JPG

web-P1010571.JPG

I actually had a more age appropriate ornament activity planned, but I could not find the contact paper.

Follow our other daily December activities. December 1, 2, 3, 4 and 5.

December 4, 2009

December 4

We made a gingerbread house today. Alex ran around having a good time. I don't remember our previous gingerbread houses taking so long. Or, maybe we just didn't follow the directions. When we started "gluing" the pieces together with icing we realized we had to wait 2-3 hours. After waiting, we started "gluing" again and then began waiting an hour. Next, we finally began decorating. There you have it, our Christmas activity for the day.

web-P1000446.JPG
Alex decided to rearrange the ornaments on the tree.

web-P1000454.JPG
He also thought it would be fun to pull the presents out from under the tree.

Follow our other daily December activities. December 1, 2, and 3.

December 3, 2009

Holiday Ornament

web-P1000315.JPG

To make these ornaments print out the pattern Ornaments.pdf and use it to cut out the shapes. If your paper is patterned on only one side, you will need to cut out two of each shape and glue them together. I used a glue stick. Then I used hole punch to place a hole in the top. I cut ribbon of various lengths and tied them to the ornament. I then used a command hook to attach them to the ceiling. Cute, cheap, and easy! I did consider using dental floss or fishing line, but in the end I decided I liked the look of the ribbon. If you are using two pieces of scrapbook paper for each ornament, you could glue the ribbon between the sheets of paper if you don't want to use a hole punch and tie the ribbon. If you have a paper cutter with ornament shapes, you can skip the step where you cut out the shapes by hand and use your instrument to do so. I think I might get them laminated so I can use them year, after year, after year.

web-P1000320.JPG

I couldn't decide between snowflakes, snowmen, gingerbread men, presents, stars, or ornaments for this year. This possibilities are endless.

December 2, 2009

Christmas Tree Napkins

There is a little independently owned quilt shop the next town over. They carry designer fabrics that you can't buy at places like Wal-Mart or Jo-Ann's. The ladies there are always really helpful and freely give away patterns. One of my favorite patterns is for Christmas Tree napkins. These are super simple to make. One napkin takes two fat quarters (one each of two different materials). If you would like six napkins, you will need two yards of material (one yard each of two different materials). To get six napkins out of a yard of material requires a little finesse, but you can do it!

This is a little hard to explain, but if you have a circle that is 20 inches in diameter (across the center of the circle) and you cut it in half, you have the shape that you need for the napkin. Cut out half circles of both of the materials and sew them right sides together. Make sure and leave a space to turn the material right side out. I left my opening on the straight side of the material.

web-P1040954.JPG

Turn the material right side out and press. Use the step-by-step pictures below to fold the material into a Christmas Tree shape. Once you have the shape you desire, iron the napkin again.

web-P1040955.JPG

web-P1040956.JPG

web-P1040957.JPG

Next, sew a straight stitch down the folded crease from the iron. This will allow you to know where to fold your napkin to get a Christmas Tree shape after washing. Cute and simple! Enjoy!

web-P1040958.JPG

web-P1040959.JPG

web-P1040960.JPG

web-P1040961.JPG
Depending on which way you fold your material, you can get a different look from the same napkin.

The ladies at the quilt shop said they use non-Christmas material to make these napkins and use them all year. I sort of like the Christmas Tree aspect myself.

December 1, 2009

Visiting Santa

The Friday after Thanksgiving we attempted to do some Black Friday shopping. We went around 7:00 a.m. and needless to say, everything was gone. The lines were still really long though and I do not like waiting in long lines anyway. We almost bought a new table and chairs for our kitchen, but we decided against it. One of our chairs is broken.

On Saturday, we went to Sierra Vista and Fort Huachuca. The mall in Sierra Vista has a display of Christmas trees. Alex also had his picture taken with Santa while we were there. He cried the entire time. Oh, and when did it start costing $25 to have your picture made with Santa? For my $25 I received a 5 x 7 and picture CD. After the mall we went to the Fort. It is an active military base, so we had to get clearance to enter. It is also a historical site, so civilians are allowed onto the base. It was fun to drive around and to see some of the training areas. There are also three neat museums (Fort Huachuca Museum, Fort Huachuca Museum Annex, and The U.S. Army Intelligence Museum). My favorite was the Intelligence museum. They have a 12 ft section of the Berlin Wall.

web-Picture.jpg
Alex and Santa.

On Sunday we finished putting up Christmas decorations.

web-P1000315.JPG
To make these hanging ornaments I simply cut out an ornament shape from scrapbook paper. There is patterned paper on both the front and the back. I tied a ribbon through ornament and hung up using command hooks. The ribbon was cut at different lengths. Cheep, easy, and cute!

web-P1000320.JPG
Closeup of an ornament.

Yesterday was my birthday. Gabe and I went to see New Moon. I think this movie was much better than the first, but I still prefer the books. After the show we went to Red Lobster for lunch and the Cold Stone Creamery. We picked Alex up early from school and headed home to relax. Dinner was pizza and carrot cake...yummy!

Today I am attempting to knock quite a few things off of my list. So far I am doing ok.

November 25, 2009

Christmas Pillows

Our front room needed a punch of color for the holidays, so I decided to cover the brown pillows on our brown chairs. Don't get me wrong, I love both the brown pillows and the brown chairs, but I want to brighten them up a little bit for the holiday season.

web-P1000106.JPG
Brown chair with brown pillow.

web-P1000107.JPG
Brown chair with Christmas "Package" Pillow.

These are really easy to make. Cover your pillow with your choice of material. My cover is removable since I am only going to be using the package pillows for about a month out of the year. I used a burgundy, but if you are happy with the color of your pillows, just skip this step and go right to the ribbon.

Next, using ribbon, wrap your pillow up like a package and tie with a bow. I used 3 yards of ribbon for each pillow, but the amount of ribbon needed (as well as material to cover your pillow) will vary depending on the size of the pillow. So, make sure and measure ahead of time.

If you don't want to sew a cover, you could literally wrap your pillow in the material and use the ribbon to hold everything together.

web-P1000108.JPG
Pillow closeup.

web-P1000122.JPG

Gabe even made a comment that they look like $50 pillows. The cost was around $6.00 with $4.00 of that being ribbon. If I would have waited, our grocery store had the ribbon for $2.00, but I never thought to shop for ribbon at our grocery store. Oh well. I am pleased with the way that they turned out. My photography skills just don't do the pillows justice. Oh, and yes, that is a pumpkin.

Give Thanks Journal

web-P1000125.JPG

This is our new "Give Thanks Journal". I found this idea at Toadly Crafty. Basically, it is a composition notebook covered in scrapbook paper. I used Mod Podge to adhere the paper to the notebook. Then I cut out some letters and attached them to the scrapbook paper using my Xyron. I used a glue to stick to attach the turkey and I used the Xyron again for the ribbon. Now we have a book to record what we are thankful for year after year on thanksgiving. I also like the idea of asking those celebrating with us to record what they are thankful for too.

November 12, 2009

Scarf Along

Anyone want to join me for a scarf along?

These would make great Christmas presents for next year. I would say this year, but they are already made, wrapped, and some are even shipped.

Craft Hope Quilt

On Monday I finished and mailed my quilt for Margaret's Hope Chest. They will be distributing quilts to the 200+ homeless children in the Grand Rapids (Michigan) Public School system during the Christmas season. The organizers of the event work through a site called Craft Hope. This is the fist project I have participated in, but if I am able to make the craft I will participate in many more.

Craft Hope Quilt.jpg
This is the quilt that I sent for the project. There are flames printed on the black material. The request was for boy quilts, since they were receiving a lot of girl quilts. The back of the quilt is flannel and I even sewed a little pocket. It is a soft and warm quilt. I hope that someone really enjoys it. Due to my time restrictions, I just made a simple nine block quilt.

July 17, 2009

This & That

I have a medium length list of things on my to do list that I do not want to do. So, similar to Karen, I have decided to do one lingering item each day. One thing isn't that bad. I am happy to report that it has been very successful. Hopefully, very soon, I will have a really short list of things on my to do list.

I recently finished Everyone is Beautiful by Katherine Center. The main character is Lanie. She and her husband, Peter, pack everything and move across the country so he can pursue his dream. She finds herself somewhere along the way. This is not the type of book I usually read, but I gave it a shot. It turned out to be pretty good. Plus, there is a cupcake on the cover of the book. It can't be bad if there is a cup cake on the cover, right?

We rocked at the no spend challenge the first month (June). We found plenty of free or inexpensive things to do. We went to the zoo and since we are members, it was free (or prepaid...however you want to look at it). We watched a lot of movies. Our DVR is near capacity. We have been too busy to go out and do anything for the past month or so. However, we have had a lot of unexpected expenses. There is a conference that I will be attending soon and that took a huge chunk out of the budget. There are quite a few things that had to be pre-paid (registration, classes, hotel). There is another major expense, but I don't remember it. So, if you remove those two things from the budget for July, then we aren't doing half bad.

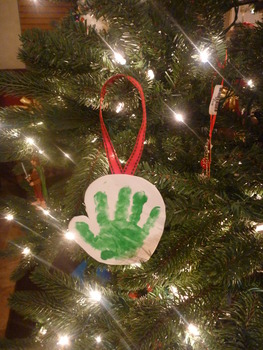
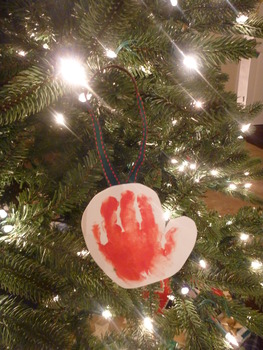
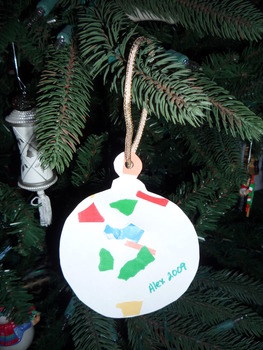
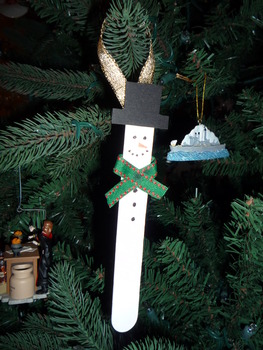
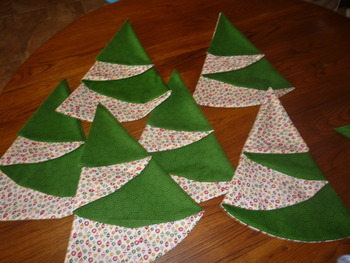
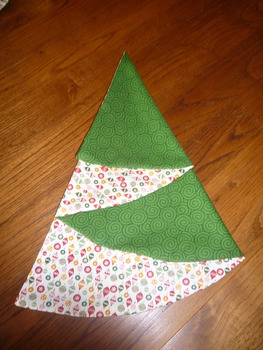
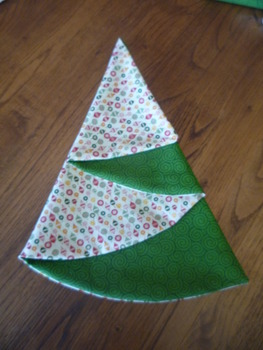
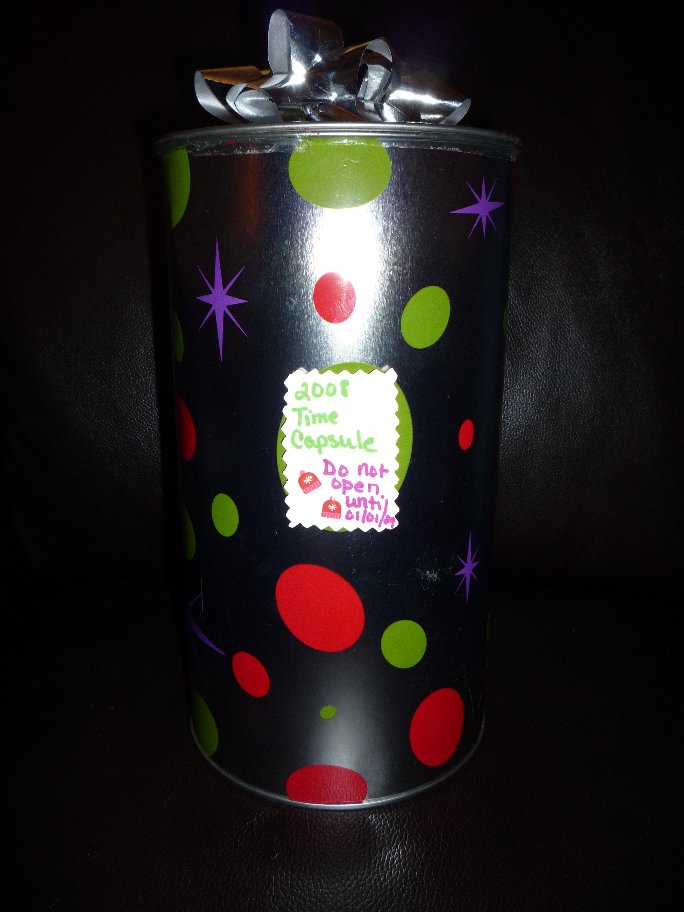
I have slowly been working on more Christmas presents. I completed 9 last night, but they were all the same thing. I need to update my spreadsheet pretty soon.

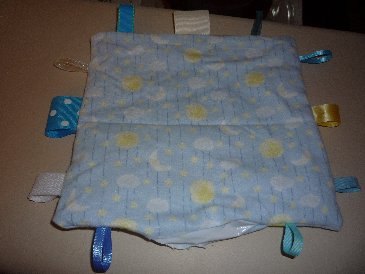
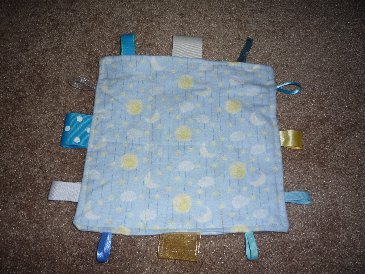
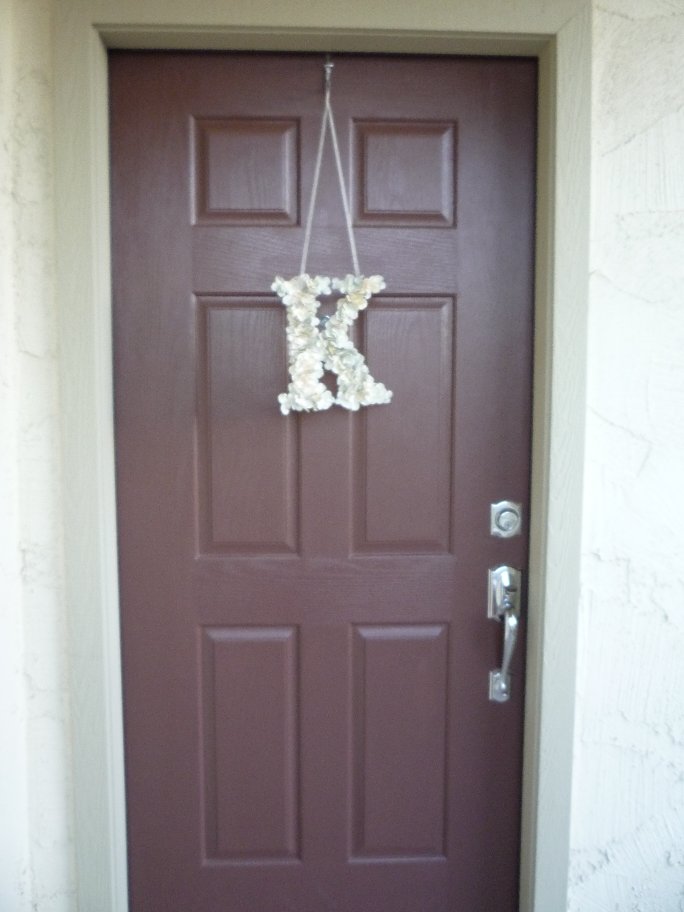
I decided to complete a few projects that I have wanted to do for a while now. I made us some luggage handle covers and I made myself a pin cushion.

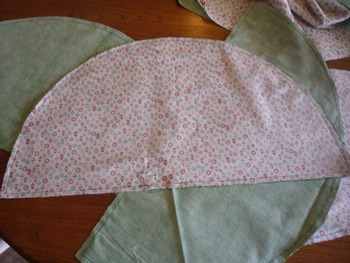
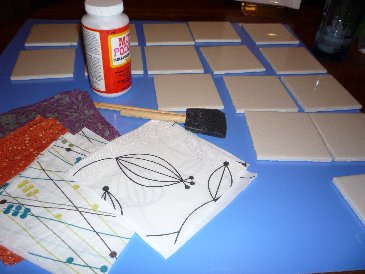
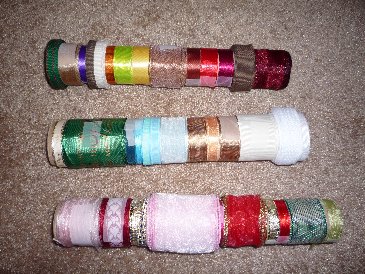
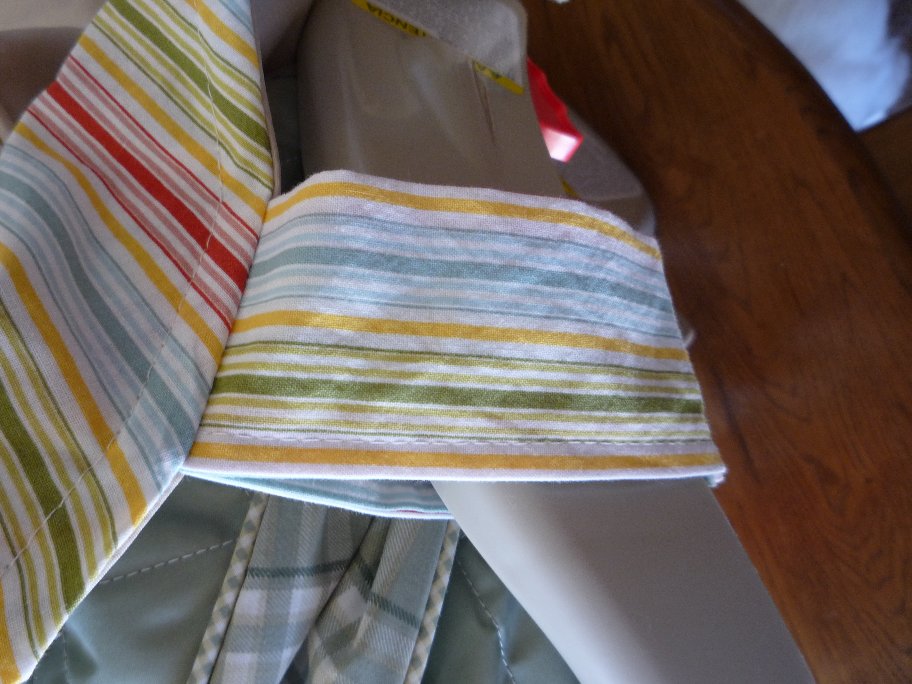
I am giving a brief description of the steps that I followed to make the luggage handle covers. I made a very tiny change to the instructions from Little Birdie Secrets. Make sure and check out her awesome tutorial for the project. She has a lot of very easy to follow pictures.

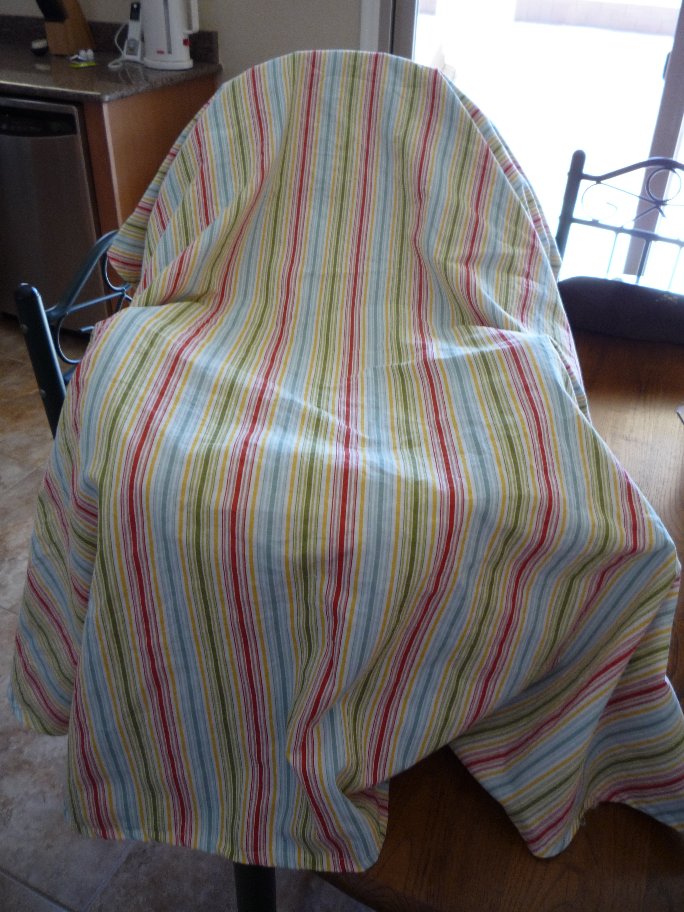
Cut out two 6 x 6 1/2 pieces of fabric and one 6 x 6 1/2 piece of batting. Place the two right sides of the fabric together and then place the batting on top. Sew the fabric together (1/4" seam allowance), but make sure to leave a small opening so you can turn the material right side out.

Luggage Handle Cover 2.jpg
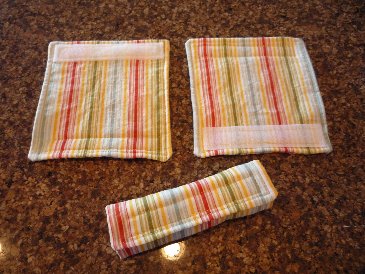
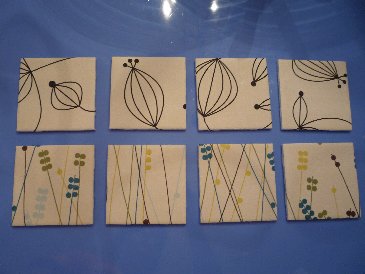
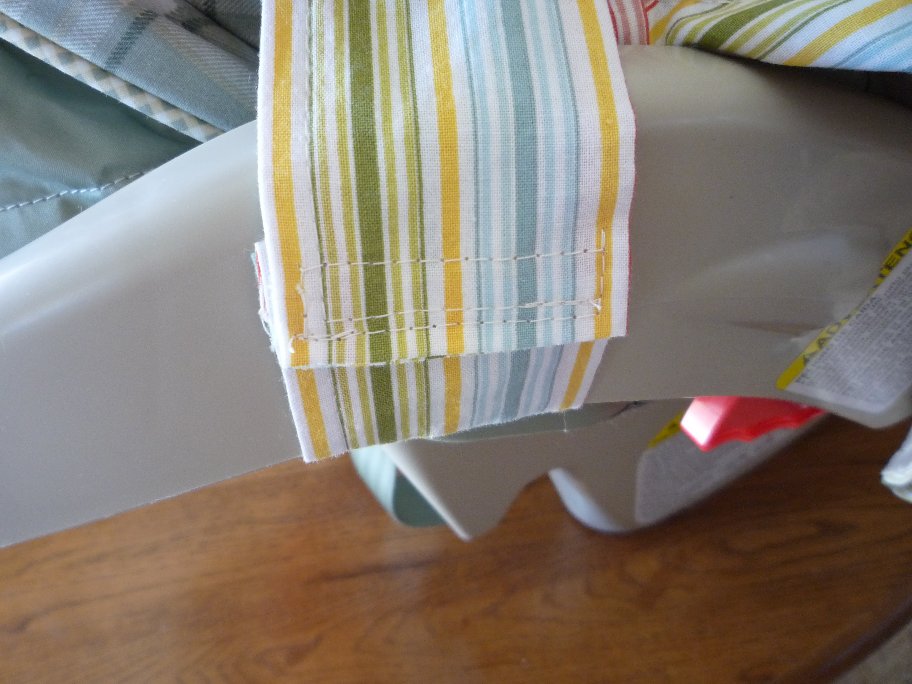
After turning the cover right side out, fold the material for the opening under and sew all the way around the cover (this is different from the tutorial on Little Birdie Secrets). Next, sew on the two pieces of 5" velcro so they match up. Place on your luggage. Now our black bags will stand out a little more. I used striped material so I had to match the lines up. If you use something with a random pattern then matching up lines won't be a problem.

Pin Cushion 2.jpg
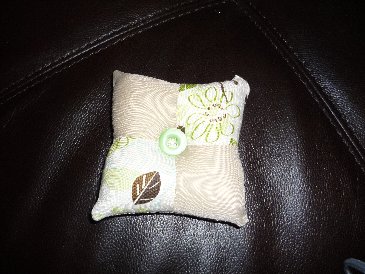
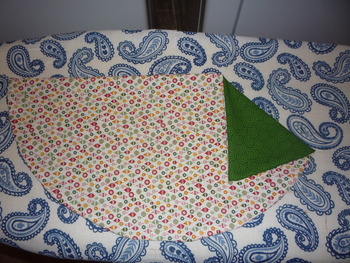
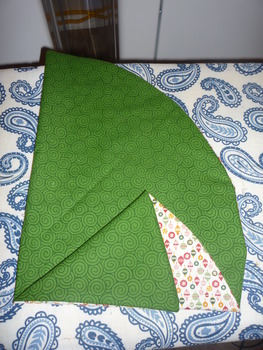
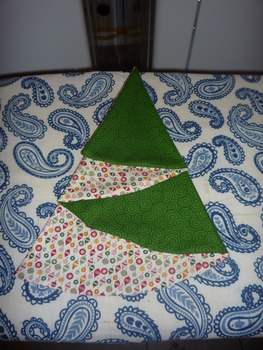
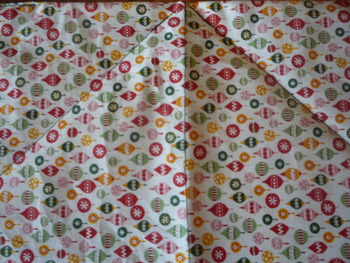
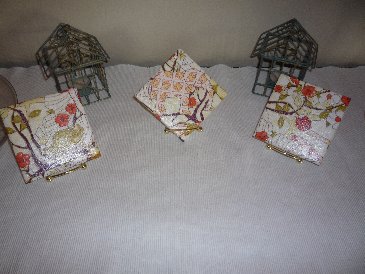
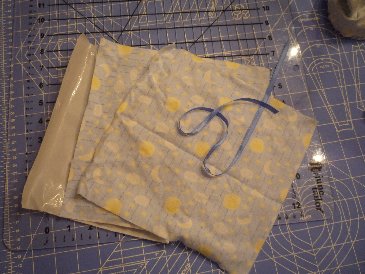
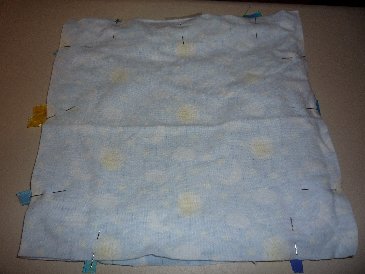
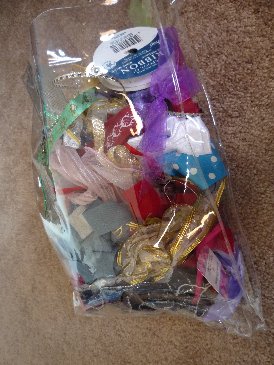
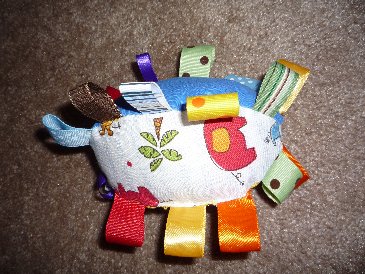
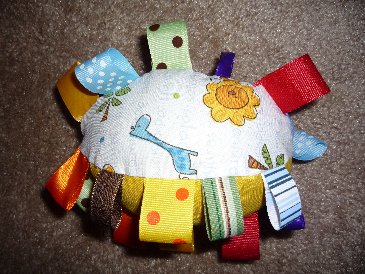
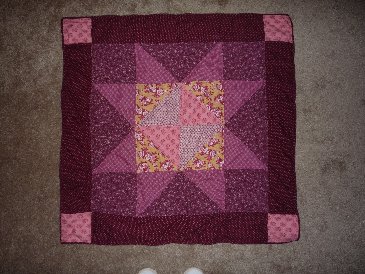
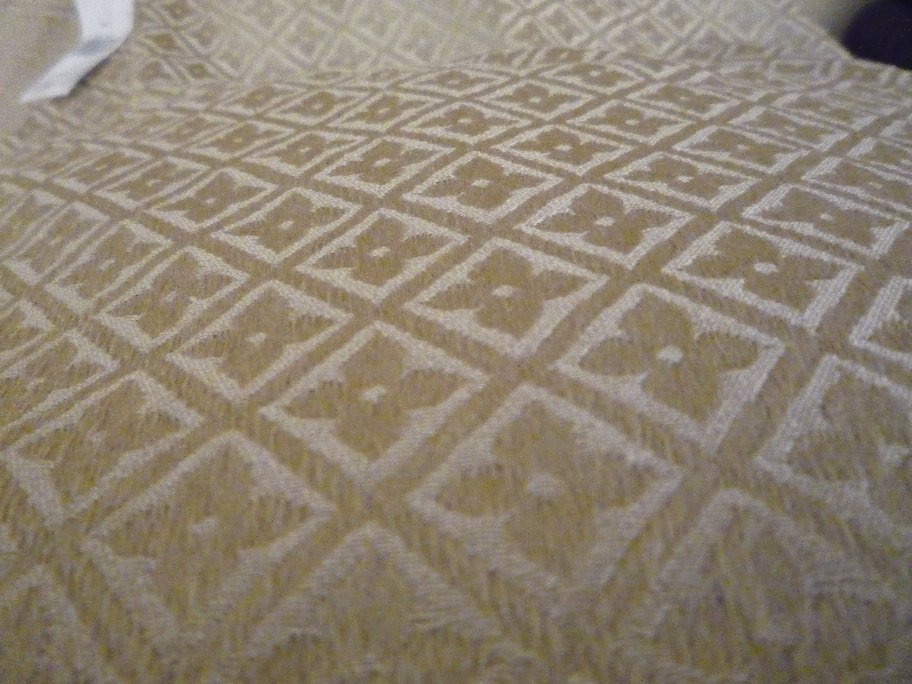
Make sure and head over to Paper.String.Cloth for a great tutorial on how to make the cute little pin cushion. I followed the directions exactly. I like the look of the patchwork, but next time I might try a solid piece of material and see how that works out.

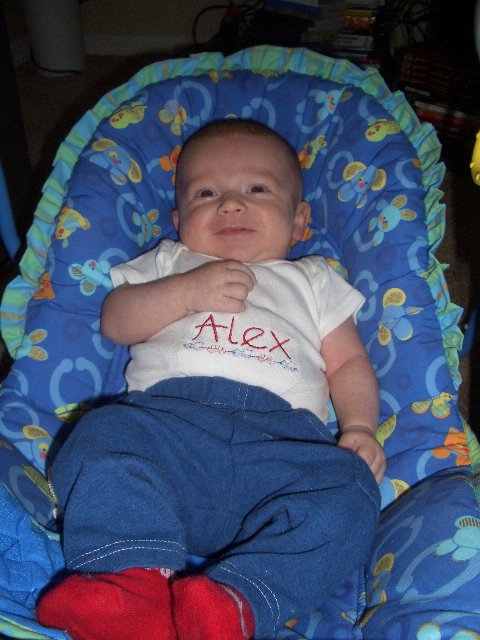
I think we might see Harry Potter this weekend. I am pretty excited. A lot of it depends on the weather. If it is still 100 or higher around 8:00 p.m. I doubt we will go. It is just too hot for Alex to sit out and watch a movie when it is that warm (we go to a drive-in).

Temperature.jpg
This was taken a few days ago. Can you read the temperature reading? It is 119! By the time we were back home it was only 111.

Books I have left to read:

Run For Your Life
by James Patterson
Rites of Spring (Break) by Diana Peterfreund
Tap & Gown by Diana Peterfreund (Available May 19, 2009)
The Lost City of Z by David Grann
Sex and the City by Candace Bushnell
The Sex Lives of Cannibals: Adrift in the Equatorial Pacific by J. Maarten Troost
Broken Music: A Memoir by Sting
Catch Me if You Can by Donna Kauffman
The $64 Tomato by William Alexander
Storm Front by Jim Butcher
The Absolutely True Diary of a Part-Time Indian by Sherman Alexie (this one is for a book club, so I had better get cracking!)

June 16, 2009

Father's Day Gift II

DAD.jpg

Just like the first Father's Day Gift that I posted, I think that this one will become a tradition too. I plan on making one of these each year. The original idea came from Brassy Apple. You could certainly take three 4x6 pictures and print them out. I was going to do this with the same frame that I used to make the first gift, but I decided to do something a little different. I used the collage print function (5x7) at Wal-Greens and bought a 5x7 frame. The collage print allowed me to easily add a title to the print. The lady at the photo counter commented on how cute the picture was. Oh, instead of buying the letters I just cut out some white corrugated cardboard that I had around. I was just going to cut the letters out of paper, but Alex loves to crinkle paper up. The entire project cost less than $3.00!

Please ignore the terrible photography. In case you are wondering, in the first picture he is biting on the "D". In the second picture he is holding the "A" and smiling. Finally, in the third picture, he is looking through the "D". I ended up taking around 30 pictures to end up with the three that I ultimately used.

June 13, 2009

Coasters

I have had a couple of people ask how to make my coasters. The original idea came from DIY Maven. I made of couple of alterations to better suit what I wanted to do.

Coaster Display.jpg
I don't actually use this set as coasters, but instead I display them on wire stands.

Here is what you need to make the coasters: plain ceramic tile(s), alcohol, something to wipe the alcohol, Mod Podge, foam brush, napkin(s) of your choice, polyurethane, craft paint brush, self-sticking felt

P1010244.JPG

Wipe down each of the tiles with alcohol. Wait for them dry. Cut the napkins into more manageable sized pieces and remove all layers but the very top. Place Mod Podge on the tile using the foam brush (top and sides). Then, lay the napkin across the tile smoothing as you go along (top and sides). Allow to dry for a couple of hours.

Coaster 2.jpg
After the coasters are dry, brush a small amount of Mod Podge along the edges of the back of the coaster.

Coaster 3.jpg
Fold the excess napkin over the back and remove excess napkin.

Using the small craft brush apply three coats of polyurethane. Make sure and wait at least three hours between coats. After the final coat allow the coaster to dry for at least twenty-four hours before continuing.

Coaster 4.jpg
Cut self-sticking felt and apply to the back of the tile. Your coasters are ready to use (or display).

Crinkle Blanket with Ribbon

While we were on cruise in Alaska I came up with an idea. Alex loves to play with paper (he loves the noise it makes), but it always ends up in his mouth. So, I decided when we returned from our vacation, I would make him a mini-blanket with the plastic inside (the type used in other crinkly baby toys). I figured I could buy some a craft store. Well, my idea turned out to not be so original. Joy's Hope already posted something very similar to what I was going to do, but she had a few improvements over my idea. She used the plastic from a package of baby wipes and she added fun pieces of ribbon.

Crinkle Blanket 1.jpg
Other than a sewing machine and thread, you will need two squares of material (I used 9.5" x 9.5" flannel). You will also need a selection of ribbon (I used 4" pieces, 3 pieces on each side) and something that makes the crinkly noise (I use a baby wipes package) cut into a 9" x 9" square. I decided on the size of the mini-blanket by the maximum amount of baby wipes packaging I could use.

Crinkle Blanket 2.jpg
Pin the ribbon (folded in half) between the two pieces of material (wrong sides together). Instead of pinning the ribbon flush, I like to have it stick out a little bit from the flannel. This way it definitely gets sewn down. Also, do not pin in one piece of ribbon. This will be the area where everything is turned right side out. The ribbon can be sewn in at that time. Start just below the area where the ribbon will be added later and sew around the square. Make sure and leave a gap to add the last piece of ribbon and so the material can be turned right side out.

Crinkle Blanket 3.jpg
After sewing, turn the material right side out. Make sure and push the corners out. I did not sew the plastic with the material. Instead, I placed it through the opening.

Crinkle Blanket 4.jpg
Next, fold in the opening and add the ribbon. This time sew all the way around the square, making sure to sew the ribbon in place and the opening closed. Since the plastic material was not sewn in place earlier, I sewed three lines down the square of material (sort of like quilting). If I do another one, I might do a waves or the letter "A" for Alex.

June 12, 2009

Father's Day Gift

Fathers Day Gift.jpg
This is one of Gabe's Father's Day gifts. It is pretty easy to make. Just buy a picture frame that holds three pictures. I traced Alex's hands on some scrapbook paper and placed them in the frame along with a fun picture of Gabe and Alex. If Gabe has a favorite picture that he would rather have in the frame, it can easily be replaced. I thought I would post this early in case anyone else would like to make one. Now if I can just keep Gabe away from my blog until next Sunday. Please ignore my photography skills.

June 10, 2009

Organizing Ribbon - WFMW

I have a bag of ribbon that I have collected. This "organization" makes it a little difficult to know exactly what ribbons I actually have in my stash.

Ribbon Unorganized.jpg

I use paper towel rolls (after the paper towels are used) and wrap my ribbon around them. I secure the ribbon to roll with tape where it is attached and the end of the ribbon to keep it from unrolling.

Ribbon Organized.jpg

Now it is easy to see what ribbons I have and they are more accessible to use.

See other great Works for Me Wednesday tips over at We Are That Family.

May 16, 2009

Football with Tags

The original idea for football with tags came from Grace Violet. I changed it up just a bit. For some reason I did not take a lot of pictures, so visit Grace Violet for a tutorial with very helpful pictures.

Tag Football 1.jpg

1. Cut out four convex lenses from your choice of material. Mine were 7 inches long and 3 inches across. Two of the lenses had an animal print and there were one each of solid blue and solid yellow material.

2. Pin ribbon (4 inches in total length folded in half) between two of the lenses with the wrong side of the material facing each other and the edge of the ribbon lining up with the edge of the material. Sew along the side with the ribbon. Do this with the other two pieces.

3. Next, pin two of the unattached sides of the "lenses" wrong sides facing each other. Don't forget to place ribbon in between the material.

4. Repeat step three for the remaining two unattached sides, but leave a space without a ribbon so you can stuff the toy. I left my space the middle and then sewed a ribbon into the opening.

5. Stuff the football with your choice of filling. I also placed four jingle bells inside of the football.

Tag Football 2.jpg

I washed and ironed all of my fabric and ribbons before beginning.
I had 20 ribbon pieces for each football.
This idea could be used to make blocks, pyramids, circles, or other shapes.
This was also sent in the package for Maddex's birthday.

May 14, 2009

No Sew Applique Onesies

On Thursday, our friend Aaron flew in to see us. Before Alex and I headed out the airport, I started working on some decorated onesies for Alex. I have been meaning to snaz up his plain white onesies for a while, and what better inspiration than the need to pick someone up at the airport. You can check out the tie onesie here. I have also included a couple of t-shirts that I sent to Maddex for his first birthday. These are really easy to make. Basically, you just follow the directions on the heat and bond package. You can either purchase the type that you sew or the no sew variety. The first tie that I made for Alex required sewing. The rest of the onesies/shirts were made with the no sew variety. To find patterns I used coloring books or animals off of already existing clothes. The internet is a great resource too. For letters or numbers, find a font and size you like and print it out.

Onesie Whale.jpg
Whale Onesie

Onesie Train.jpg
Train Onesie

Onesie French Bulldog.jpg
French Bulldog Onesie

Onesie French Bulldog Bone.jpg
I added the bone to the back of the French Bulldog Onesie.

Onesie Dog Front.jpg
Dog chasing ball Onesie (front).

Dog Back.jpg
Dog chasing ball Onesie (back).

Onesie Illinois.jpg
Alex modeling the State of Illinois Onesie.

TShirt One.jpg
Maddex's 1 t-shirt

TShirt Tie.jpg
Maddex's tie t-shirt

1. Pre-wash fabric and clothing item.
2. Iron fabric and clothing item.
3. Press a section of heat and bond onto the wrong side of the fabric for a couple of seconds.
4. Trace your pattern onto the heat and bond paper. Remember that you will need to flip your pattern horizontally. If you don't, then your letter or number will come out in a mirror image to the desired outcome.
5. Cut out your pattern and remove the backing.
6. Press the pattern onto your fabric (for about 10 seconds) and allow to cool.

I use an iron set on cotton with no water.
If the applique starts to come off after washing, press with a hot iron to reapply.
I wash the clothes in cold water on the delicate cycle and I hang to dry.

February 24, 2009

Vacation

Yesterday was wonderful weather for February. It was 91 degrees! We had dinner outside on our patio and then we went for a walk. It think we are going to start eating outdoors more often. It was really nice.

Gabe booked our vacation last night. We usually go to Europe in February, but we opted not to go this year. Instead, we are going to Alaska at the end of May. Neither of us have been, so it should be quite an adventure. I have a friend that went on an Alaskan cruise and he suggested getting a balcony room. Usually we just get a room with an ocean view, but this time we booked a balcony.

I also finished the quilt I was working on! It was finished while watching Still Waiting. It was the sequel to the movie Waiting. I am not sure why I rented it, because I didn't really even like Waiting. It made Waiting look like an award winning movie. It was a pointless movie about two competing restaurants and the people that work there.

Quilt.JPG
Quilt

I made this tie onesie for Alex. I was going to wait to post it on my blog, but I already emailed a picture to Brandi (I asked if she wanted one for her son, Maddex).

Tie Onesie I.JPG
Tie Onesie

Tie Onesie II.JPG
Close up of "tie"

Alex Tie Onesie.JPG
Alex modeling the onesie.

February 16, 2009

Random Stuff

Laura went back to Peoria on Saturday afternoon. Before leaving, we had lunch at In-N-Out. My friend Tony loves them. You can even order off of their "official" secret menu or their other secret menu.

I finished Eclipse and I have started Breaking Dawn. I think I am on page 12, so I have a bit to read.

I have been working on Christmas presents. As of right now I have three finished and six started. I should have the six completed by the end of the month. The quilt for my grandma is one of the six. I am still working on the binding and I will hopefully finish it in two or three days. I usually work on it while we watch Ugly Betty and American Idol.

I am going to post pictures off all of the Christmas presents I am making after Christmas. I would love to do it as I complete them, but then everyone would know what they are getting for Christmas.

February 6, 2009

Zippers

Last night Alex and I went to the local high school with Gabe. He is helping the students build a robot for a competition. He has been working with them for quite a while now, but this is the first time that Alex and I went. Alex seemed to like looking around at everything. We went to Taco Bell after leaving the school. When we came back I covered two pillows. I might try to make it to the store to buy the two zippers I need to cover the remaining two pillows. Zippers just make it easier to remove the cover to wash it.

Pillow and Chair.JPG
Pillow and Chair

A friend (Dawn) came over today for breakfast and stayed until noon. It was a lot of fun. If I was thinking I would have had her over for dinner. Gabe has a work function tonight and he will be eating there.

Alex020309.JPG
Alex

February 5, 2009

Car Seat Cover

I can't tell you exactly what we have done this week, but we have been busy. We always end up going to bed later than we intended and we don't accomplish everything that we planned. Alex and I made a trip to Wal-Mart today. We bought some material. I made him a car seat cover. This way instead of throwing a blanket over him while transporting him in his carrier from the car to the store, a cover will be attached to the infant carrier.

Car Seat Cover 1.JPG
Car Seat Cover

Car Seat Cover 2.JPG
Underside of Cover

Car Seat Cover 3.JPG
Straps to Attach Cover

Car Seat Cover 4.JPG
Velcro Holds the Straps On

Infarrantly Creative served as the inspiration for the car seat cover. I attached my straps to the cover while sewing the edges of the cover. I believe the original poster sewed the cover together and then attached the straps.

I also have four pillows to cover. I already purchased the material for two of them, so I purchased material for the other two today. I didn't buy the zippers though, so I won't be working on those just yet.

Pillow Material.JPG
Pillow Material

January 31, 2009

Craft It Forward

This is my first giveaway! Craft it Forward isn't your typical giveaway though. Keep reading to figure out how you can win and/or participate. It was started by Craft Addict.

Here's the rules if you want to win a handmade ♥GIFT♥ from me. Be one of the first 3 bloggers to leave a comment on this post, which entitles you to a handmade item from me. Winners must post this giveaway on your blog, meaning that you will Craft it Forward too, creating a handmade gift for the first three bloggers who leave a comment on YOUR post about this giveaway! The gift that you send can be any price range and you have 30 days to make and ship your item(s).

Remember, it's the spirit and the thought that count! When you receive your gift, please blog about it, sharing appropriate Linky Love! If you are not one of the Top Three to comment on this post, you can still play along. Please start your own Craft it Forward chain, and encourage your blogging friends to do the same.

~If you're one of the first 3 commenters, please shoot me an email ([email protected]) with your mailing address so I know where to send your goodies! Watch out though, you might find some new stalkers waiting to see when you do your own Craft it Forward post so they can be one of the first three lucky commenters on your blog.

January 30, 2009

Decorative Letter

This is a craft that I debated if I should share it or not. The reason is I was debating making some as Christmas presents. Now everyone will wonder if they will be receiving one in December.

I made this a while back. I also made two for my grandmas.

K Close up.JPG

Supplies:
Wooden letter(s) of your choice
Paint to match flowers
Brush to paint letter
Glue (I used a hot glue gun)
Flowers off of the stems
Ribbon

Paint the letter with a color that matches the flowers. After the paint dries, use a hot glue gun to attach flower petals to the letter. Next, cut a length of ribbon and glue ends to the back of the letter to make a "hanger". Tie a loop at the top of the ribbon. Glue a flower petal to the back of the letter to hide where the ribbon is attached to the letter. Hang and enjoy.

K on door.JPG
I made this to be hung on a door, but it could just as easily be hung up inside of a house.

January 24, 2009

New Camera

I have a new camera! Gabe ordered one for me. I still miss my old camera.

We are still working on our house. Today the furniture repairman came today. He stayed from 9:30 a.m. until 4:30 p.m. repairing the damage to most of our furniture. Quite a few items were deemed non-repairable and we were given cash for them. I even helped repair a few pieces. The pieces I worked on were items that were not damaged by the movers and so he did not have to repair them. He gave me the supplies and showed me how to do it. So, I worked on a rocking chair and ottoman as well as a table and chairs set. He is out of Phoenix. If anyone is looking for a great furniture repair guy in the state of Arizona I can help you out. He actually covers the entire state and he is very reasonable.

Alex011509.jpg
Alex in his swing.

Elsa012409.jpg
Elsa

Prickly Pear Cactus.jpg
This is off of the prickly pear cactus from our front yard. It was broken and apparently you can just plant it and it will grow. We will have to wait and see.

Time Capsule.jpg
We used a gift container from Christmas to serve as our time capsule. We will open it on January 1, 2010.

December 15, 2008

Alex Quilt

We had the 30 day walk through on our house last week. Technically we haven't lived here for 30 days, but they wanted to get it in before January. Basically, we have spent every free moment working on the house and it is looking much better. I wanted to have it completed by January, but that isn't going to happen. Maybe by March 1st.

Gabe and I watched The Dark Knight last night. Christian Bale was an okay Bruce Wayne (I like Michael Keaton better) but I did not like his Batman. Heath Ledger did a good job acting, but I think he was better in A Knight's Tale, The Brothers Grimm, and Casanova. While watching the movie I worked on finishing up Alex's quilt. I started it while we still lived in Illinois and I hadn't worked on it since living in our house. So, instead of checking my email or writing a blog entry while watching the movie, I finished his quilt. It is just in time to take it to Illinois.

Alex Dog Quilt.jpg

Alex's dog quilt

Alex and Quilt.jpg

Alex hanging out with the quilt

1. Catch up on email. Check!
2. Make a Menu Check! (I even made January's menu)
3. Grocery Shop Check!
4. Mail USPS Packages Check!
5. Update Magazine Addresses...umm I have a couple left. Darn time zone differences.
6. Send my mom her recipes Check!
7. Kohl's Cash (I apparently have $20) Check! Well sort of...it expired.
8. Order Wedding present for a friend Check!

My Goals for Tomorrow
1. Start packing. I have a feeling this will be a multiple day process
2. Work on room downstairs. If we ever get our house together I will post pictures.